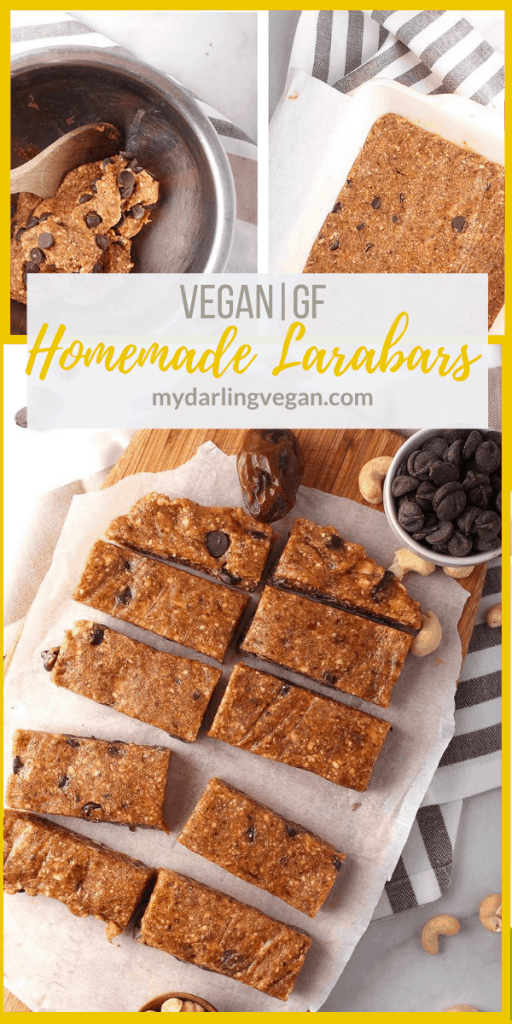
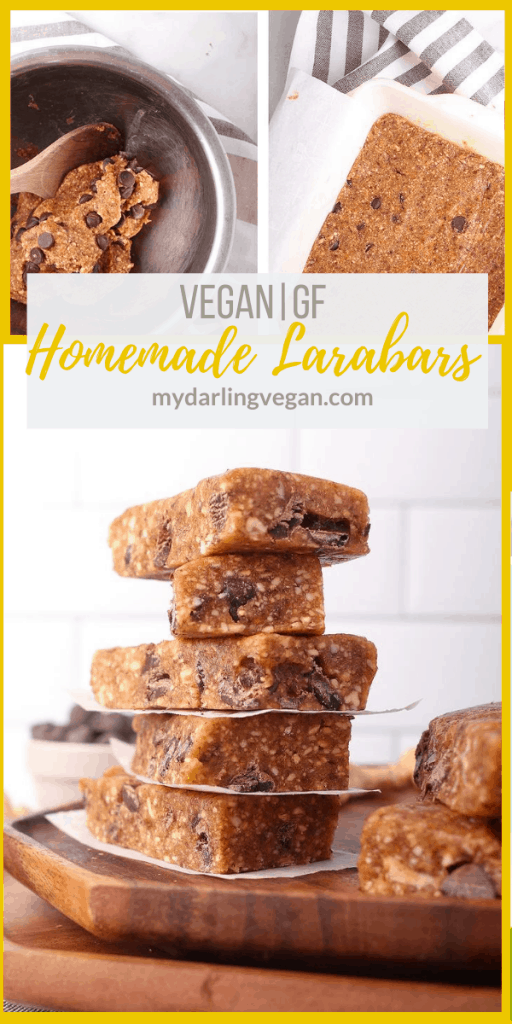
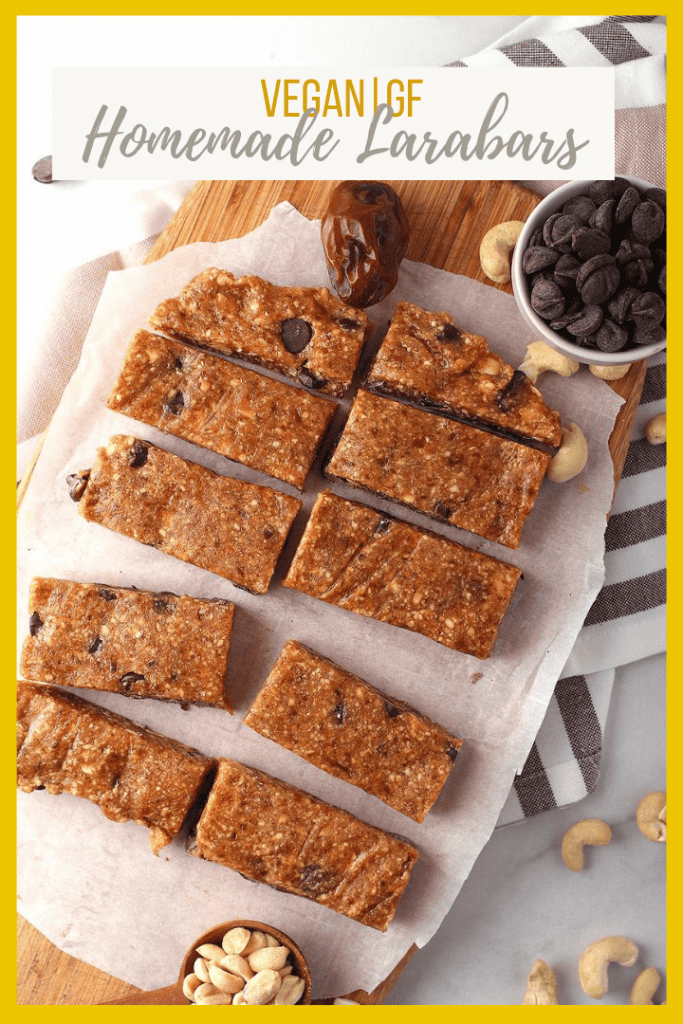
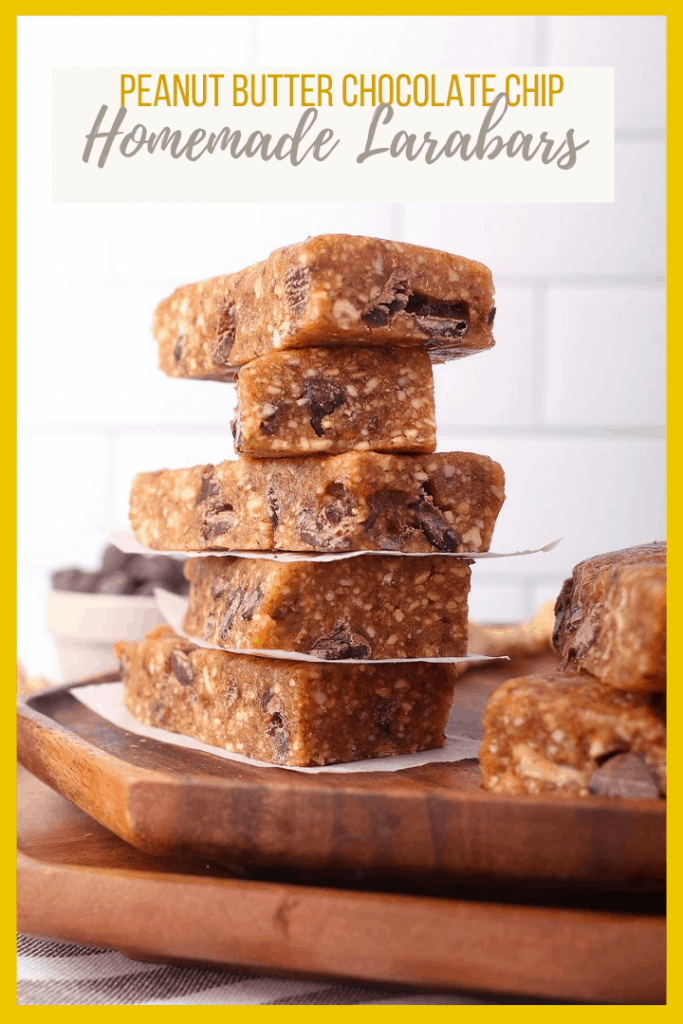
Homemade Larabars with chocolate chips are the perfect snack for busy people. Make with just 4 ingredients - cashews, peanuts, dates, and chocolate chips - for a delicious vegan and gluten-free sweet treat.
Disclosure: This post may contain affiliate links.
This homemade Larabar recipe is a healthy snack that you can feel great about giving the kids. They are great snacks for trips to the beach, day hikes, and after school snacks. Because they come in so handy, I like to make sure I always have them on hand.
These vegan protein bars are both vegan and grain free. They will give you (and the kids!) a boost of protein with their blend of peanuts and cashews and healthy fats.
Not only are they nutritious and delicious, but they are also super easy to make. You only need four ingredients and a few minutes to put them together.
Ingredients & Substitutions
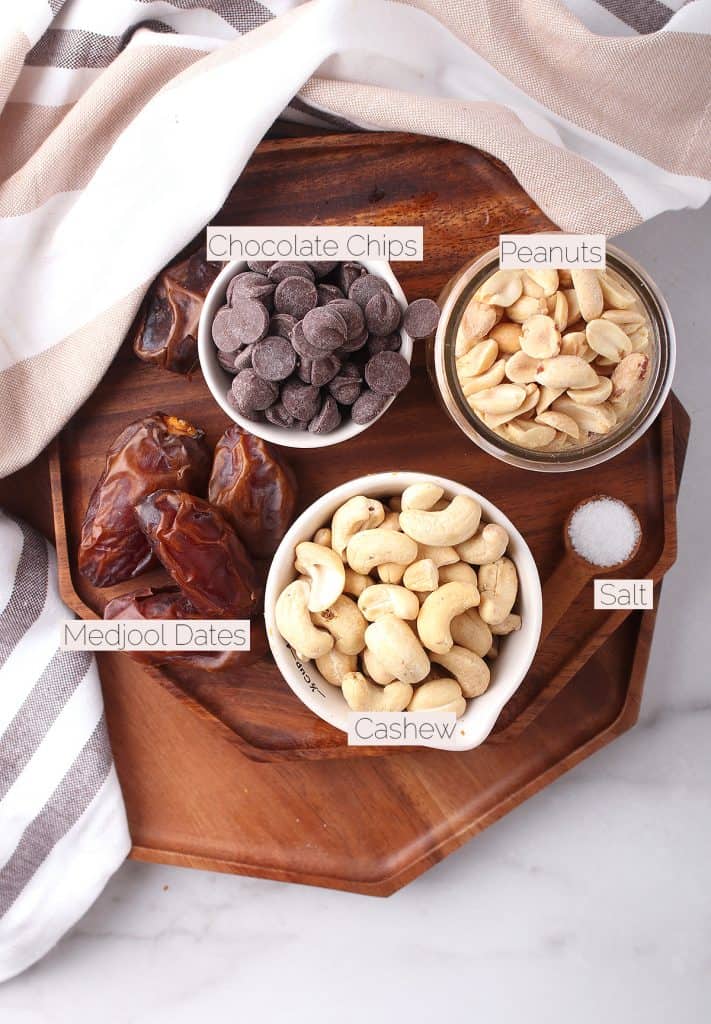
Ingredient Notes
- Chocolate Chips – Substitute cacao nibs for a sugar-free and raw version.
- Medjool Dates - I recommend using Medjool dates. Medjool dates are bigger and juicier than traditional dates which help bind the ingredients together. Without Medjool dates, you’ll risk getting a crumbly bar.
- Roasted peanuts - I usually use unsalted, but if you want a saltier snack bar, you could use peanuts roasted with some salt. Just watch for hidden ingredients in salted nuts.
Step-by-Step Instructions
Step One - Create the dough
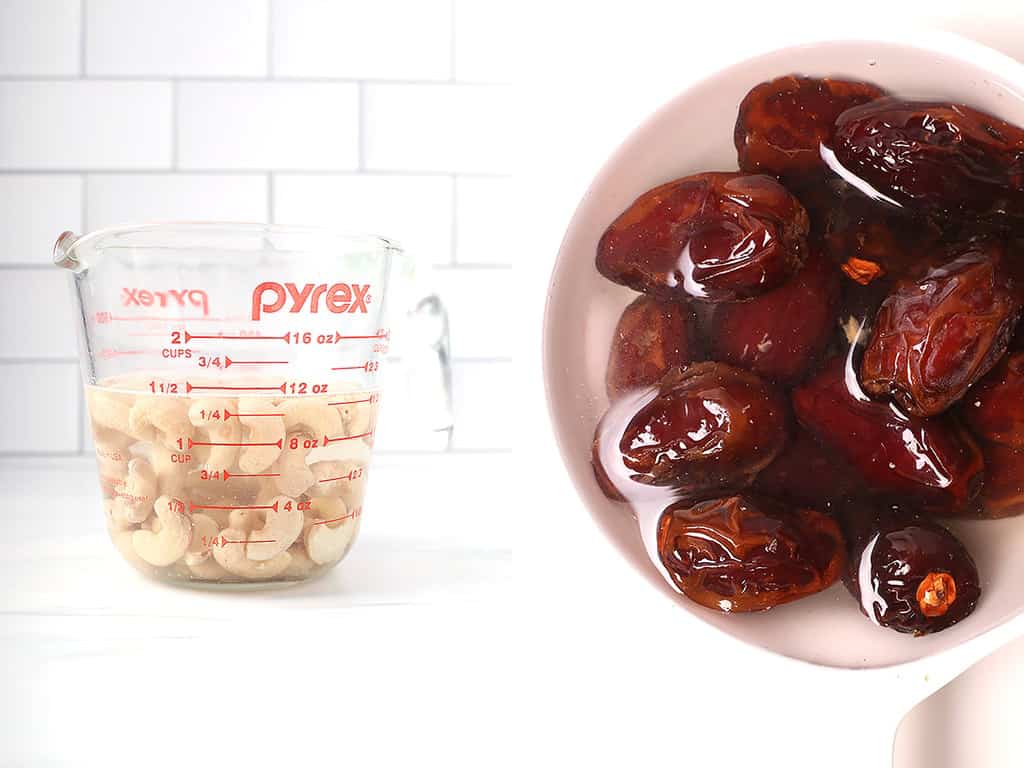
Before you get started, soak the cashews and dates for 30 minutes in water. Once they have softened some, drain them and rinse them. This works well in a colander or strainer.
Pro Tip: Do not skip this step. Soaking the dates and cashews make them soft enough to break down when blended together.
Pour the cashews and dates into a food processor along with the salt and peanuts. Blend the mixture until the nuts are broken into tiny pieces and the sticks together when you press into it. This should take about 2 to 3 minutes.
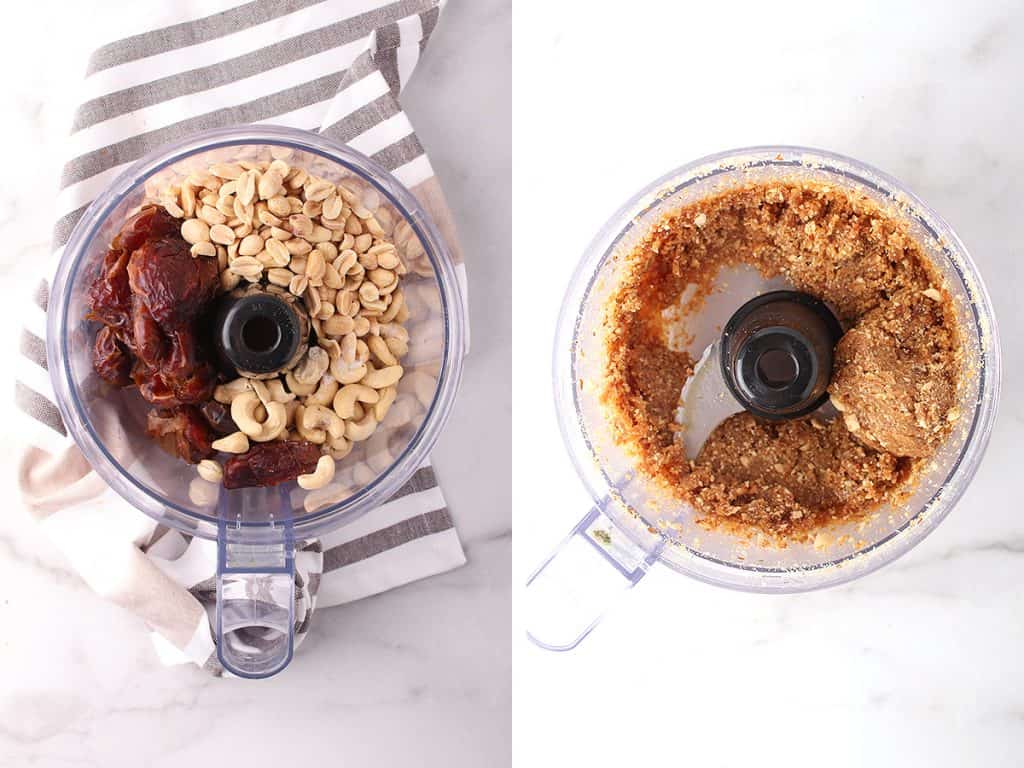
You may need to add 1-2 tablespoons of water to bring the dough together. Add it slowly and add just enough for the dough to come together when pressed between your fingers.
Step Two - Mix in the Chips
Scoop the dough into a small bowl. Pour the chocolate chips into the bowl. Use either a sturdy wooden spoon or your hands to thoroughly mix the chips into the dough. The dough is going to be thick, so your hands might work best.
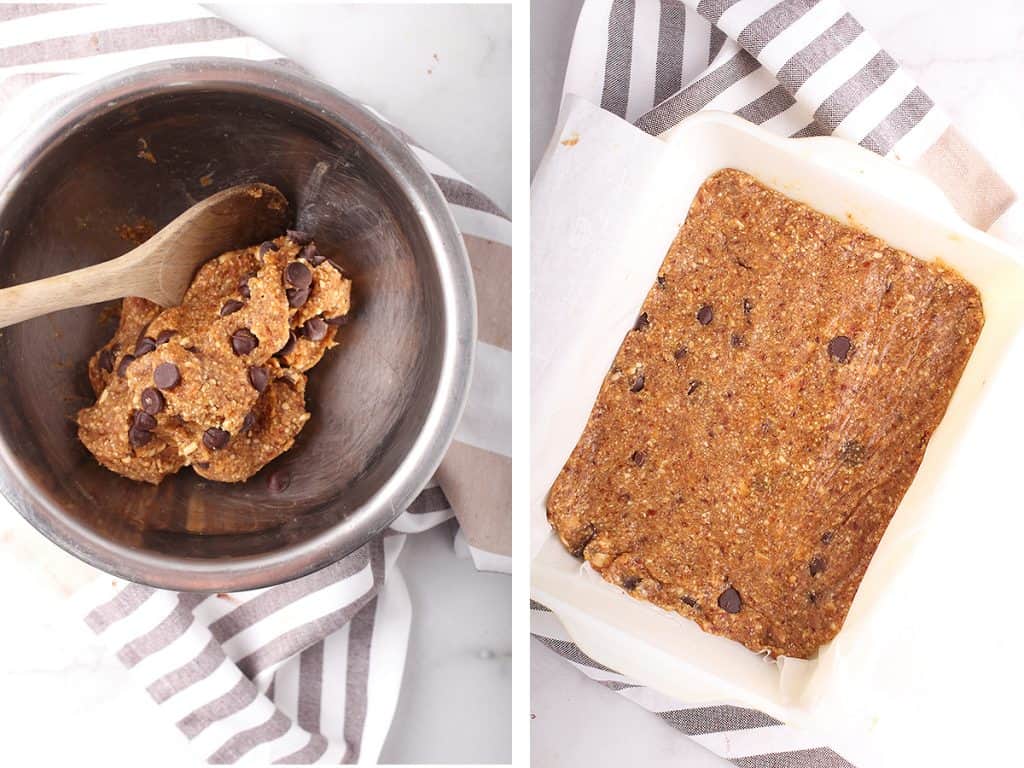
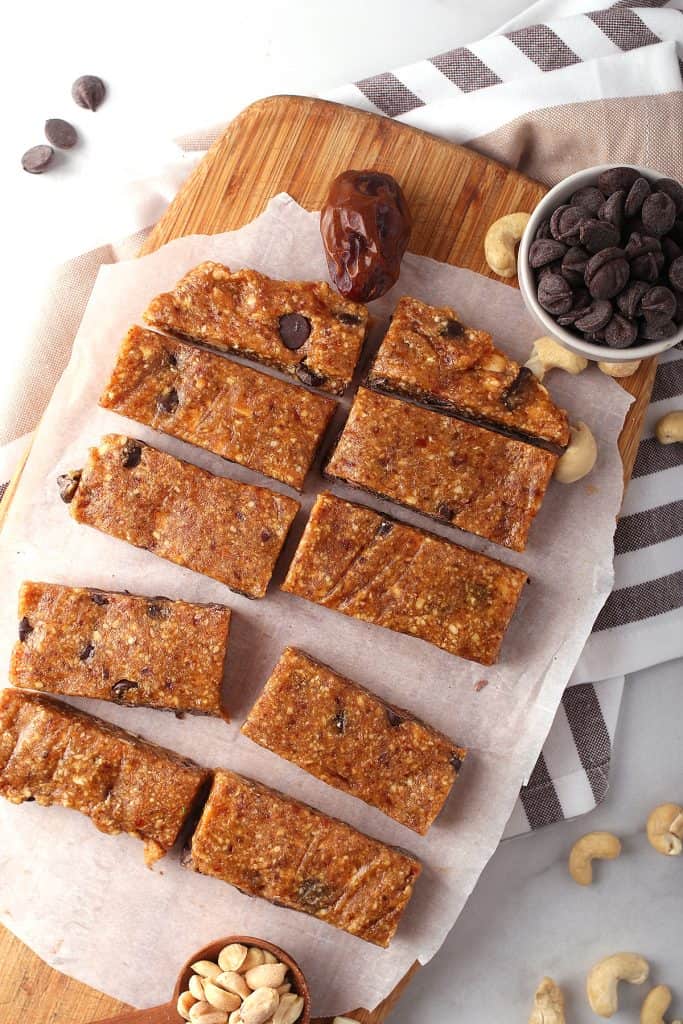
Step Three - Shape and Cut
Use parchment paper to line an 8x8 baking dish. This can be glass or metal, it doesn’t matter because you won’t be baking the bars. Cut the parchment paper just a little bit big so that you have some extra handing over the edges.
Place the dough into the lined dish. Press down on the dough so it evenly distributes throughout the dish.
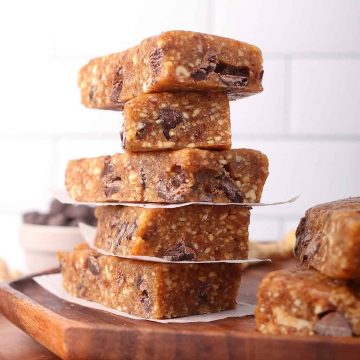
Before cutting, chill the dough for at least one hour. When the bars have set, cut into 12 equal bars.

Serving And Storing
Serving - You can serve the bars as soon as you cut them or store them for later. These are a great, healthy snack full of good fat and protein. You can take them along to work as a good midmorning or midafternoon snack or eat one right after a workout.
Storing - Store the bars in an airtight container in the refrigerator for up to 5 days.
Tips and Tricks
- Do not skip the soaking step! Soaking the dates and cashews make them soft enough to break down when blended together.
- Use cacao nibs for a raw and paleo alternative.
- Depending on the moistness of your dates, you may need to add a little water to get the mixture to the right consistency. Add 1 teaspoon at a time until it sticks together when pressed.
- Make sure to use parchment paper to ensure the bars are easily removable from the baking dish.
- Store in individual bags for a quick take along snack. You can store them in a big container, but if you put them in individual bags you have an easy, ready to go snack.
- Store in the refrigerator! The bars are not baked and can become very soft, melty at higher temperatures. For best results, store them in the fridge and use a cooler if traveling with them.
Frequently Asked Questions
If you want to use additional nuts, you can. You can add them in place of the chocolate chips as a yummy, healthy addition to them.
Cashews, along with dates, make up the base of this bar. They are fatty, relatively soft, and neutral flavored. I do not recommend using a different type of nut for the cashews.
For sure! Feel free to swap out the peanuts for almonds, pecans, hazelnuts, or pistachios.
These are the perfect make ahead snack. You can bring them to work, school, or the gym. You can also freeze these bars for up to 3 months. For added convenience, store the bars individually in sealable bags and grab them as you need.
More Healthy Snack Recipes
- 4-Ingredient Chocolate Chip Cookies
- Protein-Packed Granola Bars
- Teriyaki Mushroom Lettuce Wraps
- Superfood Grain-Free Granola Bars
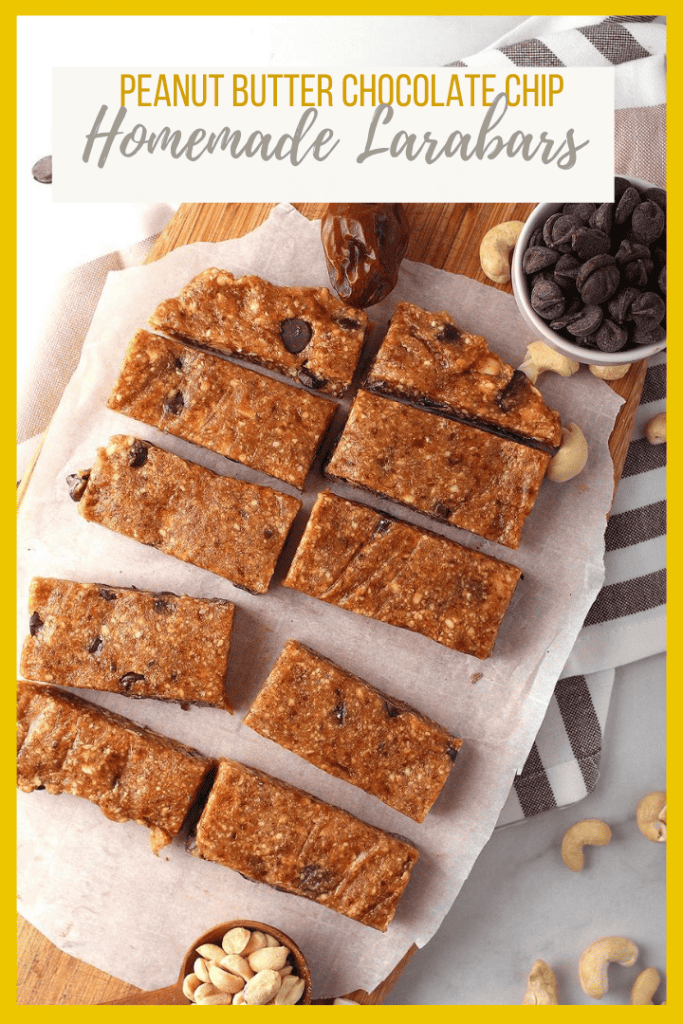
Homemade Larabars w/ Peanuts & Chocolate Chips
Ingredients
- 1 ½ cup pitted Medjool dates, packed
- 1 cup roasted peanuts, unsalted
- ½ cup raw cashews
- pinch of sea salt
- ⅓ cup vegan chocolate chips
Instructions
- Soak the cashews and dates for 30 minutes. Once they are slightly soft, drain and rinse. Place them, along with the peanuts and salt, in a food processor and blend until nuts are broken into tiny pieces and the dough sticks together when pressed.
- Transfer the dough to a small bowl and mix in chocolate chips. The dough will be quite thick and you should use a wooden spoon or your hands to thoroughly mix.
- Line an 8x8 baking dish with parchment paper, leaving a little extra to hang over the edges. Place the dough inside the dish, pressing down so that it is evenly distributed. Refrigerate for at least one hour. Cut into 12 equal bars. Store in the refrigerator for up to 5 days.
Notes
- Do not skip the soaking step! Soaking the dates and cashews make them soft enough to break down when blended together.
- Depending on the moistness of your dates, you may need to add a little water to get the mixture to the right consistency. Add 1 teaspoon at a time until it sticks together when pressed.
- Make sure to use parchment paper to ensure the bars are easily removable from the baking dish.
- Store in individual bags for a quick take along snack. You can store them in a big container, but if you put them in individual bags you have an easy, ready to go snack.
- Can I use something other than cashews? Cashews, along with dates, make up the base of this bar. They are fatty, relatively soft, and neutral flavored. I do not recommend using a different type of nut for the cashews.
- Can I use something other than peanuts? For sure! Feel free to swap out the peanuts for almonds, pecans, hazelnuts, or pistachios.
 Hi, I’m Sarah. I’m a 14-year (and counting) vegan, professionally trained photographer, former pastry chef, founder of My Darling Vegan, and author of the
Mandie says
Oh my goodness... Never buying lara bars again. I love being able to whip these up and they taste sooo good! I am going to use them as dessert because they feel like such a treat. THANK YOU for this recipe!!
Brenda Burgos says
Hi, I would like to try this recipe. What size food processor would you recommend? I am living out of the country right now and would like to choose the right size. If I can find garbanzo beans, I will probably be using it to make hummus as well. I am thrilled to find your recipe for my favorite flavor Larabars, since I can't find them in China, and I am missing them!!! Thank you!
Sarah McMinn says
Any size would do, although a larger size may be better. I would focus more on getting a strong motor. This is the food processor that I have and I love it!
Macy says
Do these have to be refrigerated? I’m wanting to make them for vacation next week wonder if they’d keep at room temp for three days?
Sarah says
As long as they are well wrapped, that should be fine.